How to Set Up a Secure Home Network: A Step-by-Step Tutorial

As our homes become increasingly connected, with everything from our lights to our refrigerators now having internet capabilities, securing our home networks is more important than ever. A secure home network not only protects your personal information and devices from potential cyber-attacks but also ensures the safety and functionality of your smart home devices. Here’s a step-by-step guide to help you set up a secure home network and safeguard your digital life.

The first step to securing your home network is to assess your current setup. Make an inventory of all the internet-connected devices in your home, from computers and smartphones to smart speakers and security cameras. Identify the types of connections each device uses – wireless (Wi-Fi), Ethernet (wired), or both – and take note of the age and software version of each device. This will help you understand the scope of your network and identify potential vulnerabilities.

Once you have a clear picture of your connected devices, it’s time to review the security settings of your router, the device that creates and controls your Wi-Fi network. Most people use the default router provided by their internet service provider, but you can also purchase your own. Either way, it’s crucial to update the pre-set configurations to enhance security. Start by changing the default administrator credentials to a strong and unique password. Then, create a new network name (SSID) to prevent hackers from identifying your router type and potential vulnerabilities.

Another critical step is enabling encryption for your Wi-Fi network. Encryption scrambles the data transmitted over your network, making it unreadable to unauthorized users. Select WPA2 or WPA3 encryption – the latest and most secure options available. Your router may also offer an older encryption protocol called WEP, but this is less secure and should be avoided if possible. WPA2 and WPA3 are industry-standard protocols that ensure robust protection for your network.

In addition to strong encryption, using strong and unique passwords for your Wi-Fi network is essential. A complex password that combines uppercase and lowercase letters, numbers, and special characters will make it difficult for hackers to guess. Avoid using personal information, common words, or sequences, and consider using a password manager to generate and store secure passwords. It’s also a good idea to change your Wi-Fi password regularly and not share it with anyone you don’t trust.

One of the most effective ways to enhance the security of your home network is to create a separate network for your IoT (Internet of Things) devices. Many IoT devices, such as smart home hubs and IP cameras, have weak security measures, leaving them vulnerable to attacks. By segregating these devices from your main network, you can limit the potential damage of a breach. Set up a guest network on your router specifically for IoT devices, or invest in a separate router and create an isolated network.

Just as important as strong passwords is the consistent application of software updates. These updates often include security patches that fix vulnerabilities and protect your devices from known threats. Enable automatic updates where possible, or regularly check for updates on all your devices, including your router, computers, smartphones, and IoT devices. This simple step can significantly reduce the likelihood of a successful cyberattack.

Finally, installing security software on your devices adds an extra layer of protection to your home network. This includes antivirus software to detect and remove malware, as well as firewalls to monitor and block unauthorized incoming traffic. Many comprehensive security suites offer additional features, such as VPN services for secure web browsing and parental controls for managing online activity. These tools can help safeguard your personal information, prevent unauthorized access, and give you greater control over your digital security.

The Pros and Cons of Cloud Gaming: Is It Right for You?

Cloud gaming has revolutionized the way we play video games, offering convenience and accessibility like never before. With cloud gaming, you can play the latest AAA titles and immersive indie games without the need for expensive hardware or long downloads. All you need is a stable internet connection and a compatible device, such as a smartphone, tablet, or low-end PC, to start gaming. The appeal of cloud gaming lies in its accessibility and convenience. No longer are gamers restricted by the hardware they own; with cloud gaming, the latest and greatest games are just a click away.

One of the key benefits of cloud gaming is its cost-effectiveness. Traditionally, gamers had to invest in pricey consoles or high-end gaming PCs to play the latest releases. Cloud gaming eliminates this barrier by providing access to powerful remote hardware for a low monthly subscription fee, similar to how we consume music and movies through streaming services like Spotify and Netflix. This makes gaming more affordable and opens up the hobby to a wider audience.

Cloud gaming also offers unparalleled device compatibility. You’re not limited to playing on a specific console or PC; instead, you can game on almost any device with a screen and an internet connection. This includes older PCs that might not have the specs to run modern games locally, as well as mobile devices, allowing you to game on the go. The flexibility to switch between devices seamlessly means you can enjoy a true cross-platform experience without being tied down to a specific machine.

However, one of the main concerns with cloud gaming is latency, as the quality of your gaming experience heavily relies on a stable, low-latency internet connection. While cloud gaming services have made tremendous strides in reducing lag, the reality is that a poor connection can still ruin your gaming session. This is especially noticeable in fast-paced multiplayer games, where a slight delay can mean the difference between winning and losing.

Another potential downside is the lack of ownership over the games themselves. With cloud gaming, you’re essentially renting access to a game for as long as you subscribe to the service or continue paying the game license fees. If you decide to cancel your subscription or a game is removed from the service, you’ll lose access to your saved games and progress, unless the game supports an alternative way to save your progress, such as through the cloud or locally on your device.

Cloud gaming also raises questions about the long-term preservation of games. Unlike physical media or locally installed digital copies, the availability of games on cloud services is dependent on licensing agreements and the continued operation of the service itself. This means that certain games may disappear from the service over time, and there’s no guarantee that you’ll be able to access your favorite titles in the future.

Despite these concerns, cloud gaming remains an enticing option for many gamers, especially those who don’t want to invest in expensive hardware or deal with the hassle of regular downloads and updates. It offers a convenient, affordable way to play a wide variety of games across multiple devices. For casual gamers or those who value accessibility and convenience, cloud gaming is certainly worth considering.

In conclusion, cloud gaming has both advantages and drawbacks. The decision to embrace cloud gaming depends on your personal preferences and gaming habits. If you value convenience, accessibility, and the ability to play the latest games without breaking the bank, then cloud gaming might be the right choice for you. However, if you prioritize low latency, own a high-end gaming PC or console, or prefer to have full ownership and long-term access to your games, then the traditional model of gaming may better suit your needs.

Mastering Your DSLR Camera: From Auto to Manual Mode

Photography has long been a beloved hobby for many, and with the advancements in camera technology, it has become increasingly accessible to enthusiasts and professionals alike. While modern DSLR cameras offer a plethora of automated features that make capturing stunning images easier than ever, mastering the manual mode can take your photography skills to the next level.

Making the switch from Auto to Manual mode can be daunting at first, but it gives photographers unparalleled control over their craft. Manual mode allows you to adjust camera settings such as aperture, shutter speed, and ISO to fine-tune your photos and create unique and artistic effects. By embracing this mode, photographers can explore their creative vision and develop a deeper understanding of the art.

The aperture setting, for instance, controls the depth of field in your images. A wider aperture lets in more light and creates a shallow depth of field, blurring the background and drawing attention to the subject. Shutter speed, on the other hand, freezes or blurs motion, allowing you to capture fast-moving subjects or create dreamy, motion-blurred effects. Adjusting the ISO setting controls the camera sensor’s light sensitivity, enabling you to capture clearer images in low-light conditions or achieve crisper details in well-lit environments.

Embracing manual mode encourages photographers to slow down and thoughtfully consider each setting before snapping the shot. It fosters a deeper understanding of the camera’s capabilities and how different settings interact to create the desired result. With practice, photographers can develop a more intuitive sense of these settings, allowing them to adapt to various lighting conditions and capture spontaneous moments with precision.

Additionally, manual mode opens up a world of creative possibilities. Experimenting with long exposures, light painting, or multiple exposures can lead to captivating images that showcase your unique artistic vision. Mastering manual mode also means you can better handle challenging lighting situations, ensuring well-exposed and crisp images, even in tricky environments.

While Auto mode has its advantages, Manual mode empowers photographers to explore, experiment, and ultimately, master their craft. It encourages a more mindful and creative approach to photography, rewarding enthusiasts and professionals alike with stunning, one-of-a-kind images. So, if you’re ready to take your DSLR camera to new heights, embracing manual mode is certainly a worthwhile endeavor.

To start your journey towards mastering your DSLR, familiarise yourself with the camera’s manual and the functions of each button and dial. Then, practice adjusting the aperture, shutter speed, and ISO in various lighting conditions to understand their effects. Online tutorials and photography communities are excellent resources for learning tips and tricks. Remember, practice makes perfect, so keep shooting and embracing the magic of manual mode.

In conclusion, while modern DSLR cameras offer convenient automated features, switching to manual mode unlocks the full potential of your photography skills. It empowers you with creative control, encourages a deeper understanding of your craft, and opens doors to a world of artistic possibilities. So, embrace the challenge, dive into manual mode, and capture the world through your unique lens. With practice and patience, you’ll soon be crafting breathtaking images that reflect your distinct artistic vision.

Top 7 Noise-Cancelling Headphones: A Comparative Review

In a busy world filled with distractions, it’s no wonder that noise-canceling headphones have become a must-have accessory for many. Whether you’re looking to immerse yourself in your favorite album, concentrate in a noisy environment, or enjoy some peace and quiet during a long flight, the right pair of headphones can make all the difference. With that in mind, let’s take a look at seven of the best noise-canceling headphones on the market today and see how they stack up against each other.

First on our list is the Bose QuietComfort 45. These headphones are industry-leading when it comes to noise cancellation, with a sleek design and comfortable fit that make them perfect for long-term wear. The sound quality is well-balanced, delivering clear and crisp audio. However, some reviewers note that the bass could be more powerful. The Sony WH-1000XM4 is another excellent option, offering a more fun and exciting sound profile while still providing effective noise cancellation. These headphones also come with a host of impressive features, such as touch controls and the ability to pair with two devices simultaneously.

The Sennheiser Momentum 4 Wireless is a great choice for those seeking a premium experience. They offer a refined and detailed sound, with a touch of extra bass that gives them a modern feel. The noise cancellation is effective, and the design is both stylish and comfortable. For Apple users, the AirPods Max is a strong contender. They offer seamless integration with Apple devices, a unique and comfortable design, and impressive sound quality. However, they are on the heavier side and come with a hefty price tag.

Moving on, we have the Philips PH805, which offers impressive performance at a more affordable price point. The noise cancellation blocks out a good amount of background noise, and the sound is well-balanced and detailed. For travelers, the Anker SoundCore Space Q35 is worth considering. They offer a lightweight and compact design, making them easy to pack, and provide effective noise cancellation and a clear, detailed sound. Lastly, the Jabra Elite 85h stands out with their long-lasting battery life and smart features, such as automatic pausing when the headphones are taken off.

So, which pair is right for you? It depends on your priorities. Whether you’re after the ultimate noise cancellation, exceptional sound quality, or a more affordable option, there’s something on this list for everyone. Each of these headphones delivers a compelling mix of features and performance that will enhance your listening experience.

The Ultimate Beginner’s Guide to 3D Printing

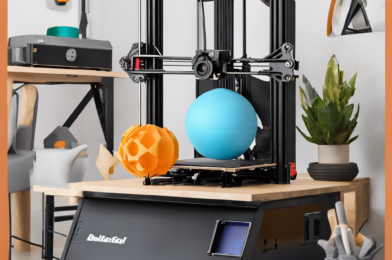
3D printing has revolutionized the way we create and prototype objects, making it accessible to everyone from hobbyists to entrepreneurs. Once a novel concept, this technology has rapidly evolved, and 3D printers are now commonplace in homes, schools, and businesses. With its growing popularity, you may be curious about how to get started with 3D printing and unlock the power of this exciting technology. This beginner’s guide will provide an overview of the 3D printing process, offering insight into the hardware, software, and materials used, as well as helpful tips for setting up your first print job.

The foundation of 3D printing is the printer itself. These machines utilize an additive manufacturing process, building objects layer by layer from the bottom up. There are various types of 3D printers available, employing different technologies and materials. The most common type is Fused Deposition Modeling (FDM) printers, which use a thermoplastic filament, extruded through a heated nozzle, to build objects layer by layer. Other technologies include Stereolithography (SLA) and Selective Laser Sintering (SLS), which use ultraviolet light and lasers, respectively, to cure or fuse materials into the desired shape.

When choosing a 3D printer, consider your budget, the printing volume you require, and the level of detail needed for your projects. Entry-level FDM printers are relatively affordable and offer a great starting point for beginners. However, if you require higher precision or intend to print with advanced materials, you may need to invest in a more sophisticated machine. Another crucial aspect of 3D printing is the software used to create and prepare models for printing.

Several types of software are involved in the 3D printing process, each serving a specific purpose. First, you’ll need a modeling program to design your 3D objects. Popular options include Computer-Aided Design (CAD) software, such as Fusion 360 or Blender, which allow you to create precise models with complex geometries. If you’re new to 3D modeling, start with tutorials or pre-made models to familiarize yourself with the software. Once you’ve designed your object or downloaded a model from a repository, you’ll need to prepare it for printing using slicing software.

This software “slices” your 3D model into thin layers, generating the specific instructions and toolpaths your printer understands. Slicing software also lets you set important print parameters like infill percentage (how much material is used inside the object), layer height, and print speed. Taking the time to explore and understand these settings will help you achieve better print quality and avoid common issues like warping or delamination. After slicing, you’ll have a print file, typically in G-code format, ready to be sent to your 3D printer.

Loading filament into your printer and preheating the nozzle and bed (if applicable) are usually the first steps. Then, using the printer’s control panel or a connected computer, you select the print file and initiate the printing process. For more straightforward printing, some printers offer wireless connectivity, allowing you to send jobs directly from a connected device or the cloud. As your printer brings your digital creation to life, you’ll be able to witness the magic of 3D printing layer by layer.

Observing the printing process not only lets you monitor for any potential issues but also provides valuable insight into how different settings and print orientations affect the final result. Once the print is complete, you may need to perform some post-processing steps, depending on the object and your desired finish. This could include removing support structures, sanding or smoothing layer lines, and painting or applying a finish to the object. Exploring different post-processing techniques opens up a world of possibilities for customizing and refining your 3D prints.

Safety is an important consideration when working with 3D printers. Always follow the manufacturer’s guidelines and recommendations for safe use. Some key safety precautions to keep in mind include proper ventilation to avoid inhaling fumes, especially when printing with certain filament materials. It is also important to be cautious when handling heated components or recently printed objects to avoid burns. Additionally, it is recommended to provide eye protection when using 3D printing devices to avoid potential eye injuries from flying debris or splatters.

5 Easy Ways to Boost Your Wi-Fi Speed at Home

Improving your Wi-Fi speed at home can make a significant difference in your digital life, especially with the ever-increasing number of connected devices and online activities. Luckily, boosting your Wi-Fi speed doesn’t have to be complicated or expensive. Here are five simple ways to optimize your wireless network performance and enjoy faster, more reliable connections.

First, reposition your router for better signal coverage. The location of your router greatly impacts the strength and stability of your Wi-Fi signal. Place it in a central location, elevated, and away from walls or large objects that might block the signal. Try to minimize the distance between your devices and the router, as walls, floors, and other obstacles can weaken the signal. Avoid locations near metal objects, mirrors, or aquariums, as they can interfere with the signal. If possible, use a Wi-Fi analyzer app to help you find the ideal spot with minimal interference.

Second, invest in newer technology. Older routers may not support the latest Wi-Fi standards, such as 802.11ac or 802.11ax (Wi-Fi 6), which offer faster speeds and improved range. Upgrading to a newer model can make a noticeable difference, especially if you have multiple devices simultaneously accessing the internet. Also, consider replacing outdated devices that may not support newer, faster Wi-Fi standards. This ensures your network performs optimally and that you’re getting the most out of your internet plan.

Next, reduce wireless interference by limiting the number of devices connected to your network. Many household items, such as microwave ovens, baby monitors, and Bluetooth devices, can interfere with your Wi-Fi signal, causing speed issues. Try to minimize the use of these devices or switch to wired connections for the ones that support it, like game consoles and streaming media players. You can also switch your router to a less crowded channel.

How to Choose the Perfect Smartphone: A Step-by-Step Guide

With the array of smartphones on the market today, choosing the right one to suit your needs can be a daunting task. It’s easy to feel overwhelmed by the plethora of options, so it’s essential to take a step-by-step approach to make an informed decision.

First, define your budget. Smartphones vary widely in price, and it’s important to set a realistic budget that you’re comfortable with. Consider your usage patterns and prioritize features that are important to you. Do you value a great camera, a long-lasting battery, or ample storage for all your apps and media? Identify the key aspects that will enhance your daily usage and enjoyment of the device.

Take time to research and compare different operating systems, such as iOS and Android. Each has its own unique interface and features, so it’s worth understanding the pros and cons of each to decide which one aligns better with your preferences and needs. Look at the ecosystem and user experience of each operating system, considering how seamlessly your current apps and services will integrate with the device.

Don’t underestimate the importance of display quality. A good screen should offer a sharp resolution, vibrant colors, and adequate brightness for comfortable viewing in various lighting conditions, especially if you’re an avid gamer or media consumer. Pay attention to the size and build quality of the phone as well. A larger screen might appeal to you if you consume a lot of media, but a smaller, more compact phone may be preferable if you want something that easily fits in your pocket.

Camera quality has become a key differentiator among smartphones. Multiple lenses, optical zoom capabilities, low-light performance, and video recording features are all aspects to consider, so be sure to assess these features and opt for a device that suits your photography needs, whether you’re an enthusiast or simply seeking a capable point-and-shoot experience.

Another critical factor is battery life. A smartphone that can last through a full day of moderate to heavy usage without requiring a recharge is ideal. Fast charging and wireless charging support are also convenient features to look out for, ensuring you can top up your device quickly and efficiently.

Security and biometrics are crucial aspects of modern smartphones. From fingerprint sensors to facial recognition technology, these features not only keep your device secure but also offer added convenience for authentication and accessing apps and services. Finally, assess the warranty and after-sales service offered by the manufacturer. A good warranty provides peace of mind and ensures you can get the necessary support should any issues arise with your device.

By following these steps and considering your own unique needs, you’ll be well on your way to making an informed decision and choosing the perfect smartphone that will serve you well in both the short and long term.